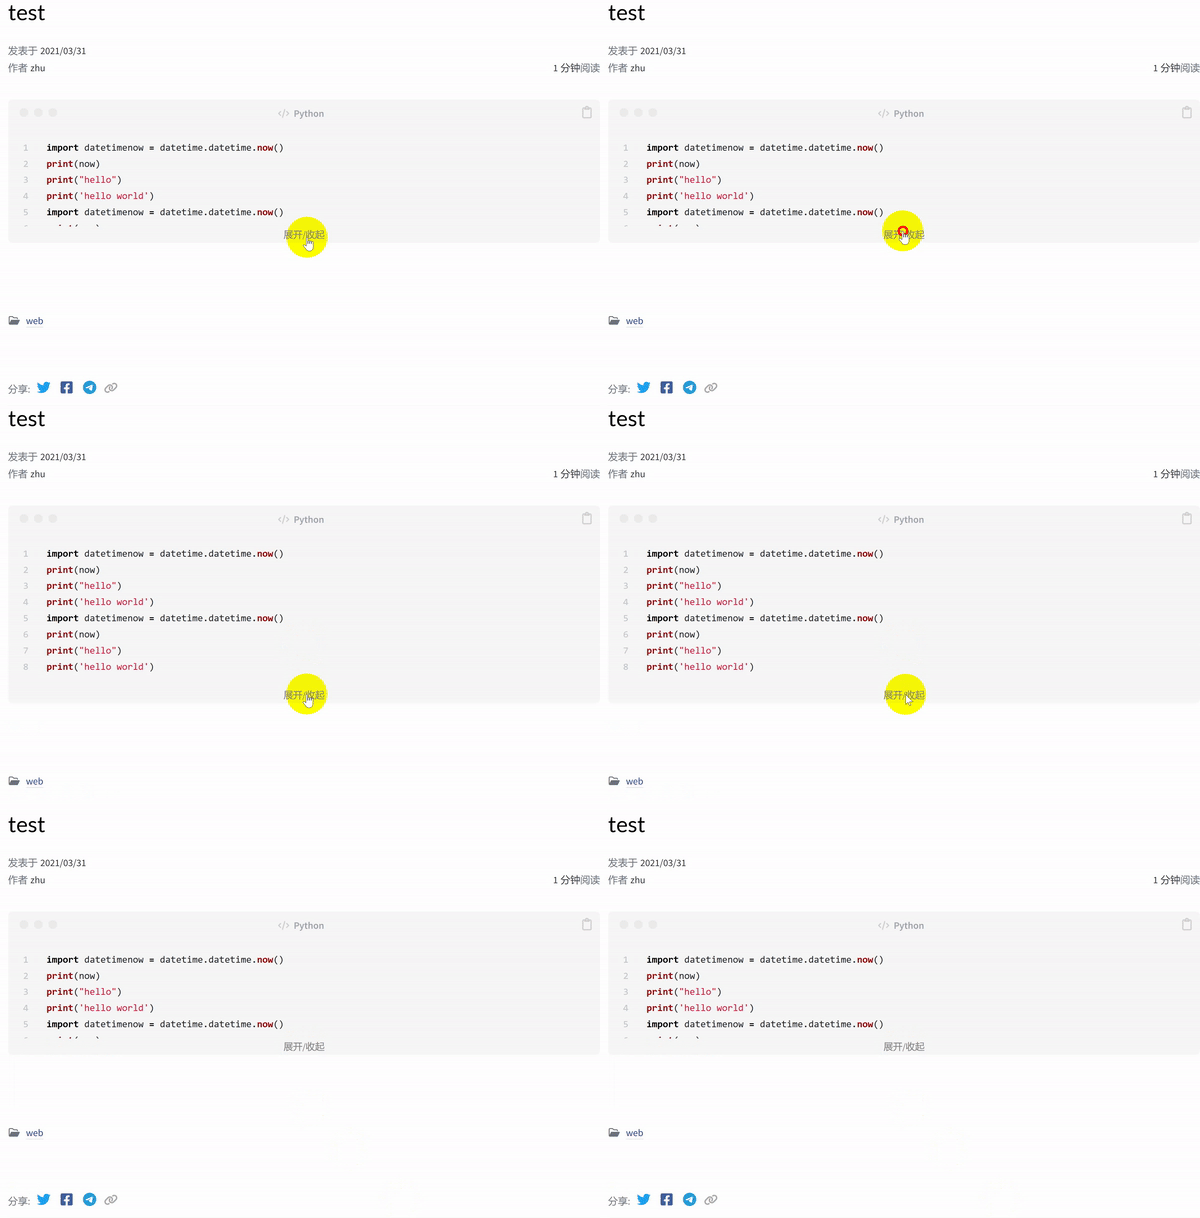
使用Chirpy主题发表文章时,插入的代码块会全部显示出来。在代码行数比较多的情况下,读者的阅读体验会比较差。阿猪希望能实现CSDN博客那样的折叠展示效果。
一、代码原型 1 2 3 4 5 6 7 8 9 10 11 12 13 14 15 16 17 18 19 20 21 22 23 24 25 26 27 28 29 30 31 32 33 34 35 36 37 38 39 40 41 42 43 44 45 46 47 48 49 50 51 52 53 54 55 56 57 58 59 60 61 62 63 64 65 66 67 68 69 70 71 72 73 <!DOCTYPE html > <html lang ="zh-cn" > <head > <meta charset ="UTF-8" > <meta http-equiv ="X-UA-Compatible" content ="IE=edge" > <meta name ="viewport" content ="width=device-width, initial-scale=1.0" > <title > 折叠代码块示例 - Demo of fold code blocks</title > <style > .collapsible-container { margin-bottom : 10px ; } .collapsible-container p { cursor : pointer; margin : 0 ; } .collapsible-content { overflow-x : auto; overflow-y : hidden; margin-top : 10px ; max-height : calc (1.5em * 5 ); } </style > <script > document .addEventListener ("DOMContentLoaded" , function ( let coll = document .getElementsByClassName ("collapsible-container" ); let maxLines = 5 ; for (let i = 0 ; i < coll.length ; i++) { let trigger = coll[i].querySelector ('.collapsible-trigger' ); let content = coll[i].querySelector ('.collapsible-content' ); let codeLines = content.textContent .split ('\n' ).length ; let tempcodeLines = content.textContent .split ('\n' ).length ; let lineCount = document .createElement ('span' ); lineCount.textContent = ' (' + tempcodeLines + ' lines)' ; coll[i].appendChild (lineCount); if (codeLines -3 <= maxLines) { trigger.style .display = 'none' ; } else { trigger.addEventListener ("click" , function ( this .classList .toggle ("active" ); if (content.style .maxHeight ) { content.style .maxHeight = null ; } else { content.style .maxHeight = content.scrollHeight + "px" ; } }); } } }); </script > </head > <body > <p > 折叠代码块示例 - Demo of fold code blocks</p > <div class ="collapsible-container" > <pre class ="collapsible-content" > <code > function helloWorld() { console.log("Hello, World!"); } function helloWorld() { console.log("Hello, World!"); </code > </pre > <p class ="language-javascript collapsible-trigger" > 展开/收起 - Fold/Unfold</p > </div > </body > </html >
在上边的代码中:collapsible-container类属性。建议使用collapsible-content的父级容器。这里使用了<pre>的父级容器<div>。collapsible-container的内部选择一个合适的标签作为折叠/展开的对象,为其添加collapsible-content类属性。这里使用了用作格式预处理的<pre>标签,因为它完整的包含了用于展示的代码内容。collapsible-container的内部、collapsible-content之外,选择一个合适的标签放置点击动作。这里选择在</pre>的下方放置一个<p></p>。<style>内部通过CSS控制折叠时的高度等显示效果。<script>内部通过JavaScript实现折叠/展开的动作。
二、修改Chirpy主题 根据Chirpy主题的代码结构特征,阿猪的大致修改思路是:<div class="language-xxx highlighter-rouge">作为容器;<div class="highlight">作为折叠/展开的对象;<div class="highlight"></div>的后边插入点击按钮;<div class="post-content">的前边插入引用语句;
请谨慎修改,注意Chirpy主题的版本差异可能会导致行位置不同或代码结构不同。具体的修改过程如下,仅供参考:
1、修改"\_includes\refactor-content.html" (1)第29行,在第2个<div>的class中增加一个collapsible-content<div>的class中增加一个collapsible-content<div>的class中增加一个collapsible-content<div>的class中增加一个collapsible-content</code></div>之后添加入下代码:
1 <p class ="language-javascript collapsible-trigger collapsible-trigger-css" > 展开/收起</p >
(6)第26行,插入如下代码:
1
2
3
4
5
{% if _content contains '<div class="language-' and '<div class="post-content">'%} {% assign _content = _content | replace: '<div class="language-', '<div class="collapsible-container language-' | replace: '<div class="post-content">', '<script src="/assets/js/collapsible.js"></script><div class="post-content">' %} {% endif %}
2、修改\assets\css\style.scss 在文件的最下方空白处插入如下代码:
1
2
3
4
5
6
7
8
9
10
11
12
13
14
15
16
17
18
19
20
21
22
23
24
25
26
27
28
29
30
31
32
33
34
35
36
37
38
39
40
.collapsible-container { margin-bottom : 10px ; } .collapsible-container p { cursor : pointer; margin : 0 ; } .collapsible-content { overflow-x : auto; overflow-y : hidden; margin-top : 10px ; max-height : calc (1.6em * 5 ); } .collapsible-trigger-css { color : gray; text-align : center; font-size : small; } .collapsible-content ::-webkit-scrollbar { width : 8px ; height : 8px ; } .collapsible-content ::-webkit-scrollbar-thumb { background-color : rgba (0 , 0 , 0 , 0.2 ); border-radius : 6px ; } .collapsible-content ::-webkit-scrollbar-thumb:hover { background-color : rgba (0 , 0 , 0 , 0.3 ); } .collapsible-content ::-webkit-scrollbar-track { background-color : #f1f1f1 ; border-radius : 6px ; }
3、创建\assets\js\collapsible.js 1 2 3 4 5 6 7 8 9 10 11 12 13 14 15 16 17 18 19 20 21 22 23 24 25 26 27 28 29 30 document .addEventListener ("DOMContentLoaded" , function ( let coll = document .getElementsByClassName ("collapsible-container" ); let maxLines = 5 ; for (let i = 0 ; i < coll.length ; i++) { let trigger = coll[i].querySelector ('.collapsible-trigger' ); let content = coll[i].querySelector ('.collapsible-content' ); let codeLines = content.textContent .split ('\n' ).length ; if (codeLines - 6 <= maxLines) { trigger.style .display = 'none' ; } else { trigger.addEventListener ("click" , function ( this .classList .toggle ("active" ); if (content.style .maxHeight ) { content.style .maxHeight = null ; } else { content.style .maxHeight = content.scrollHeight + "px" ; } }); } } });
三、一些注意事项 经过以上修改,文章内插入的代码就可以实现折叠显示的效果了。textContent.split('\n').length来判断collapsible-content所在标签内的纯文本内容的行数。换行后的空行会占用一行,一些横向显示的嵌套标签也会分别占用一行。例如Chirpy主题使用包含两个columns的<table>显示代码,肉眼看到是一行,但是对JavaScript来说却是两行。
版权声明: 未经书面授权许可,任何个人和组织不得以任何形式转载、引用本站的任何内容。本站保留追究侵权者法律责任的权利。

